Really nice quality and the material feels great.
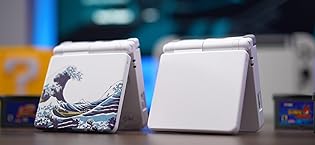
I should preface by saying you should either have a good guide or you should know what you're doing before installing these because the joycons are tricky to do without damaging anything. If you're a novice, research the repair before buying so you don't get in over your head.The material isn't the same smooth plastic as the standard switch joycons, this stuff is a soft vinyl covering the plastic frame. It feels softer to the touch and feels really nice to hold, even after the clammy hands start kicking in. It feels like it might scratch easily if it's not kept well, but I haven't had any issues with that, and I transport it almost primarily unprotected in a backpack pocket. Take from that what you will.Decal print aside, the actual molded plastic is durable and the kickstand latches haven't broken for me after a decent amount of use, and show no signs of significant wear (this has been a problem I've seen with other brand housings). After the replacement, the joycons actually seem to fit more snugly in the Switch's side-rails which I appreciate because the original housing felt just a bit... wobbly? Just a bit though. Results and experience may vary.The screwdrivers this kit comes with are *really nice*. It's a driver handle with two separate screw bits, and speaking as a professional repairman, it's a way higher quality than you'll usually find in DIY kits. This is closer to the iFixit brand stuff in quality.The original Switch buttons look better in my opinion because the white lettering is far easier to see, but that's neither here nor there and spare parts are never a bad thing. I also left the joycon SL/SR 'bumper' buttons as the original red/blue because this kit only comes with black and that seemed like it'd be hard to see quickly. Looks a little gaudy, but I rarely see them anyway.Last nice little detail about the Switch's rear housing plate, the kit does come with a replacement dust mesh, so you don't have to tear the one off your original housing plate and try to stick it back on.Overall very, very happy with this housing replacement. Looks great, feels great, and friends have thought much the same.
Another quality product from eXtremeRate
Absolutely love the way this shell feels and looks. I was very happy with the SNES Pro controller shell, so much so I decided to buy the SNES shell for my Switch itself and in all honesty the only thing I can fault on it is that they didn't include some lighter colored buttons for the X and Y on my Joycon. All they include is the darker purple. That is a bit of a bummer, but only minor gripe. Overall the shell feels good, just like the pro controller it has a sort of soft-touch to it. It's not rubber, but whatever they've used, I like the way it feels to the touch. Quality overall seems to be very good.I would call this a Medium difficulty install. The back shell of the tablet portion of the Switch is very easy but the Joycons are a little more intensive. If you've never done something like this before, I highly recommend finding a Youtube video showing you how to install something like this and following it step by step and really taking your time. Be very careful with the small ribbon cables in the joycons as they are very small and fragile and be sure to keep track of all of your screws.All in all and awesome product that really does the job that Nintendo should've done. I wish Nintendo would release more throwback special edition systems like this themselves, though I enjoyed modifying my Switch on my own. Highly recommend.
Excellent, high-quality replacement shell
The shell set was fantastic. I've used the BASSTOP joycon shells before and I found these to be a higher quality and easier to work with. The extra screws that come with the set are also much better than the BASSTOP and even the Nintendo triwing screws. The extra buttons do come attached to the mold (or whatever it's called) and need to be cut out. If you plan to use them then you may need to file them down a bit to make sure the buttons don't stick. However I didn't find anything special about them so I used the original Nintendo buttons. I did find that the home button doesn't seem to stick out quite as far in these shells as in the OEM shells, but not in a way that's unuseable. The only issue I ran into on installing this was a stripped original Nintendo screw that had to be drilled out of the console to remove the backplate. I'm not sure if this was my fault or the quality of the included triwing screwdriver, but if you already have a higher quality driver it may be worth not being lazy like me and actually grabbing it. Still, it could just be my fault so I won't dock points for it.All in all the shell looks and feels great. The NES pattern print on the back does seem a touch blurrier than I'd like on very close inspection, but not in a way that's really noticeable from a distance. While ultimately the choice between this and BASSTOP would have to come down to design preference, given the lack of translucent shells here, I would recommend the eXtremeRate shells in terms of quality, provided you see a pattern you like.
Must take apart joy-cons and switch, but worth the effort.
Warning: Do not buy if you are not prepared to spend an hour or two putting this all together with very tiny screws! You will also have to take it apart very gently because of the battery connections and all the electronic ribbons in the joy-cons!When I bought this, I envisioned it more like a phone case, when in fact, it is a completely new shell for the switch+joycons. It comes with many spare screws and buttons and a nice control screwdriver(magnetic) with the two bits you will need to open up your device. It does take time, but the shell was made nicely. You don't have to force the parts together and it is an exact match to the normal shell a switch has. It is a very smooth, almost soft plastic. It honestly looks gorgeous and I am glad I took the time to assemble it.Tips:1. Take pictures while taking it apart, so you know how to put it all back together. Every time I took a layer apart in the controllers, I took a snapshot and was able to correctly assemble it.2. I used tape to hold the buttons in place (on the outside of the cover on the joy-cons). If you don't, it can be very frustrating and they pop out constantly.3. Be aware of what bit you need for what screw you are working on! I had to swap between the two bits provided to open everything up. One is a very very small phillips (00?) and the second is a triwing bit.4. Don't force it apart! If it isn't coming open, then check again for a screw you haven't undone!5. You only need to unscrew the center screw on each side of the switch, where the joy-cons click in. You don't need to unscrew all of the on the sides. (As well as the four in the back, two on the bottom, one on the top, and one hiding underneath the tab that props the screen up)6.Don't be afraid to walk away if you are frustrated. There are many delicate components inside and you will need to patient and careful.I would give this product five stars, but it did not come with any instructions. Don't be afraid to look up videos online for help!


 Marca: eXtremeRate